
Build an FPV Huey That Looks Where You Look
A scale UH-1D Huey you fly from the pilot’s seat. Turn your head and the camera turns with you, GPS holds the helicopter in place when you let go of the stick, and your flight data sits in the goggles.
This is the whole recipe: what to buy, what to print, how it’s wired and what to set. Follow it step by step, or swap any part for gear you already own.
The short answers
Section titled “The short answers”How does head tracking work with DJI Goggles 3? The goggles aren’t involved. A separate SyncPilot module (FMS × XF Robot) sits on them and sends your head position by cable to Magic Box, and the radio link carries it to the gimbal. DJI only carries the video. Any head tracker with PPM output does the same job.
What’s the camera? A DJI O4 Air Unit Pro with a 155° field of view, on an XF C-20T 3-axis gimbal.
What’s the helicopter? The RotorScale UH-1D Huey 470 GPS from MotionRC. It comes ready to fly, with an 840 mm rotor and an ArduPilot flight controller on board.
What do you fly it with? Magic Box with a WinWing stick, an X56 throttle and WinWing pedals. Other USB gear, Virpil included, goes through the generic USB driver. A regular radio can do the job if it meets these conditions.
Where can I buy it? There’s no single kit. The shopping list links every part.
What does it cost? Roughly €2,400 for the helicopter, FPV gear and radio link (prices checked 8 November 2026). HOTAS and Magic Box come on top.
From your head to the camera
Section titled “From your head to the camera”-
On your head
-
SyncPilot, on the goggles
Measures where you look and sends it out as PPM.
-
-
On the ground
-
In the helicopter
-
Receiver
Flysky INr6-HS
Hands every channel to the flight controller over S.BUS.
-
ROBAN X2, outputs 9 and 10
Passes pan and tilt to the gimbal as two PWM signals.
-
XF C-20T
Turns the camera and steadies it.
-
Camera and video link
DJI O4 Air Unit Pro
Films where you are looking.
-
The video comes back to your goggles over the DJI link.
Every connection and interface is on the wiring diagram.
Copy it or change it
Section titled “Copy it or change it”This is our build, and you don’t have to match it. Most parts have replacements, and some you can leave out.
To turn your head and watch the camera follow, you need five things: a helicopter with a flight controller, a gimbal, a head tracker, an FPV camera with goggles, and a radio link with two spare channels. The brands are up to you.
| What you need | What we use | What else works |
|---|---|---|
| Helicopter | RotorScale UH-1D Huey 470 | Any ArduPilot helicopter with two free servo outputs. The printed mount fits this fuselage only. |
| Gimbal | XF C-20T | Any gimbal that takes pan and tilt as PWM. The mount and wiring here are made for the C-20T. |
| Head tracker | SyncPilot | Any tracker with PPM output. |
| FPV camera and goggles | DJI O4 Air Unit Pro, Goggles 3 | The gimbal manual also covers DJI O4 and O3. We’ve flown the O4 Pro only. |
| Transmitter | Magic Box with HOTAS | A radio with a head-tracker input and enough channels. We haven’t flown this route. |
| TX module and receiver | Flysky FRM303, INr6-HS | Any pair that delivers S.BUS with 11 channels or more. |
| Battery | 4S Li-ion, 71 × 43 × 43 mm | Another 4S pack, but the printed cage fits one size only (step 2). LiPo also needs a different low-voltage setting. |
You can leave these out:
- Flight data in the goggles. It takes custom firmware, and it’s the riskiest step here. Head tracking and video work without it, and the goggles still show the video link status and pack voltage.
- The HOTAS tuning in step 5. The gimbal needs only the first two parameters.
- The printed mount, if you’d rather fit the gear your own way.
The recipe
Section titled “The recipe”- Shopping list: what to buy, what’s optional.
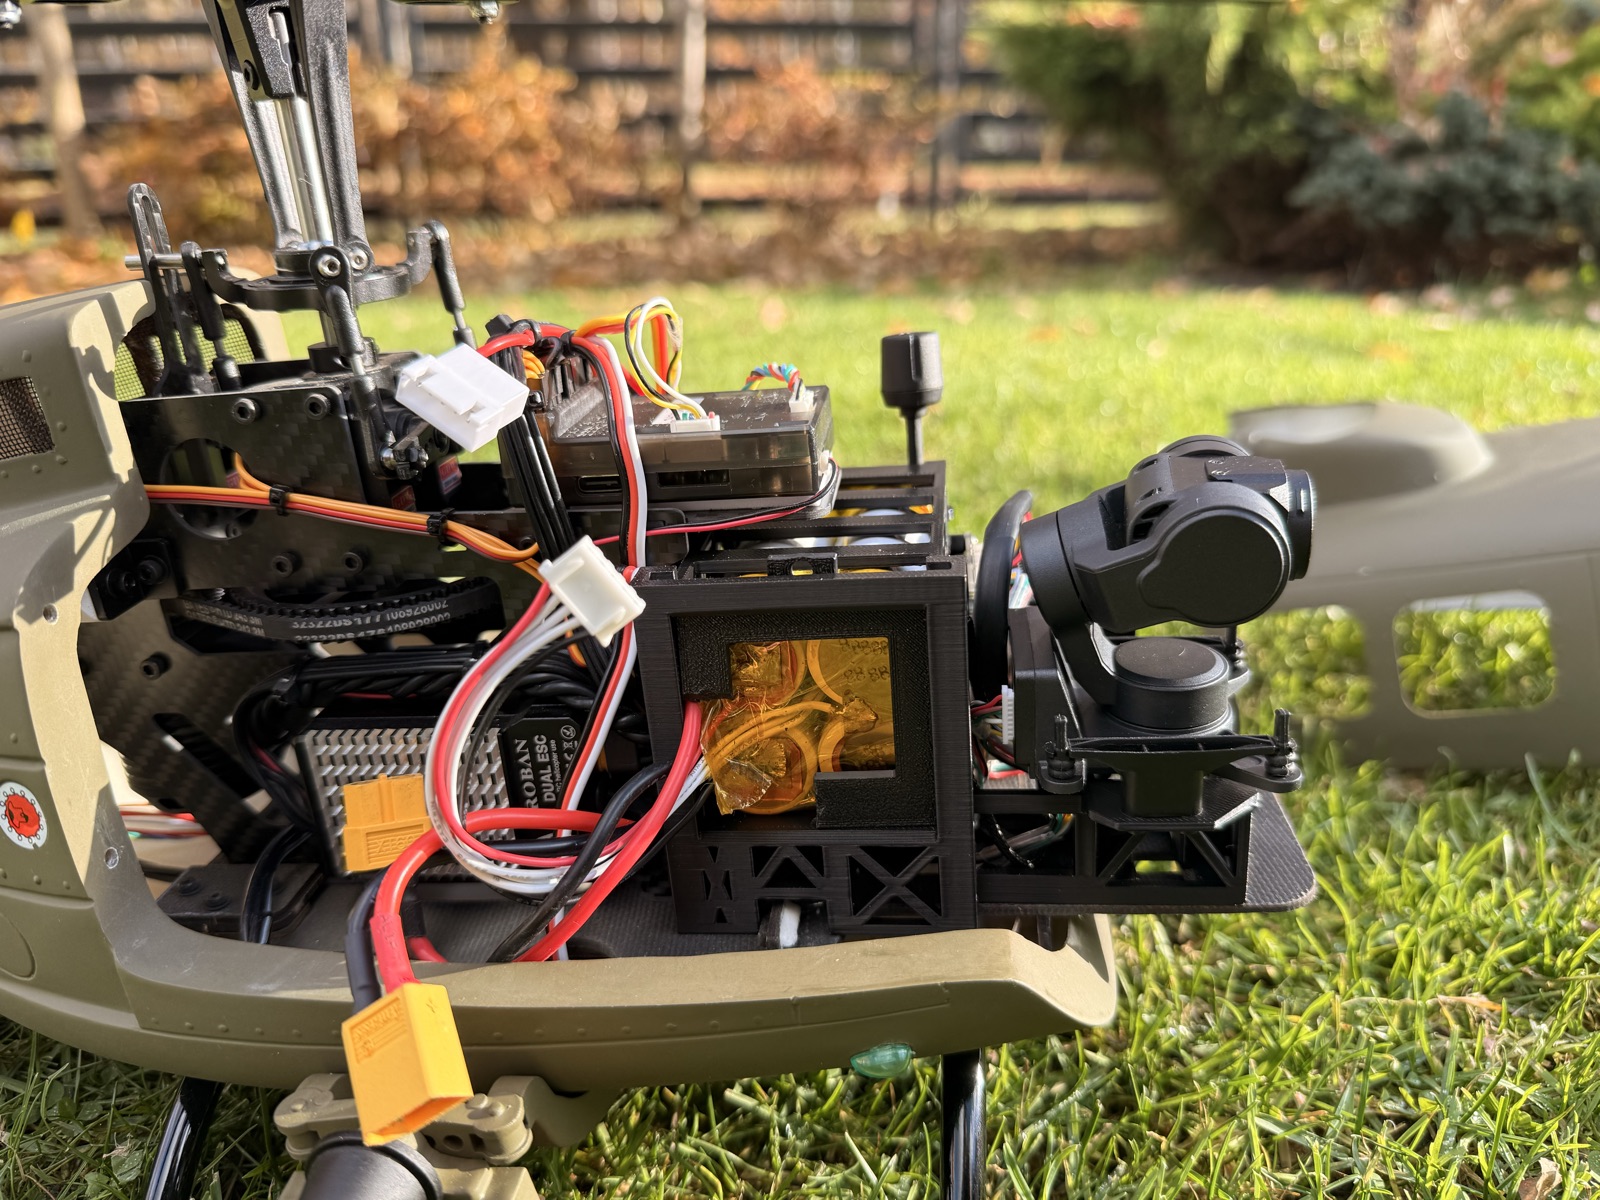
- Print and mount: one printed part holds the gimbal, battery and air unit.
- Wiring: power from the pack, two signal wires to the gimbal.
- Head tracker and Magic Box: the channel plan.
- Flight controller: the handful of parameters we changed.
- OSD in the goggles: optional custom firmware and how it was made.
- First flight: checklist, failsafe test and common problems.
All the 3D files, firmware and manuals are on one page: Downloads.
What we’re still tuning
Section titled “What we’re still tuning”Vibration in the picture. The image is calm with the rotor stopped and shows strong vibration and jello from lift-off onwards. We’re working through blade tracking, then mount isolation, then gimbal gains, one change per flight.
Radio failsafe. On the bench, disarmed, switching the TX module off triggers the failsafe, but a pulled PPM cable doesn’t: the module keeps sending the last values. Secure the PPM plug. Step 7 shows the armed test to run before you rely on the failsafe.